Monday, September 3, 2012

Creating a banner for baby Juliet

This is the finished product for my baby shower.  I'm sure you see some Pinterest ideas all put together in one event.  I made the decorative cup cake stands, rosette balls, pom poms, tea sandwiches, cranberry scones, and of course the Juliet banner.


 This post will highlight how I made the banner.  It's really simple and you can make yours anyway you want it to.  

For most of it I used what I already had available in my craft room.  There are a few items I had to purchase.


Materials used:
* Scrap booking paper of choice
* Bias Tape
*Glue Gun
*Ribbon
*Chipboard Pennant (cardboard triangles: I used 6"x9" Extra heavy by Paper Accents)
*Decorative punch
 Pick a color, I chose white, to make the trim around the triangles.  Use any decorative punch that will give you a clean edge on the other side.  You will be gluing this  on the back side of your triangle.
 This is Chipboard Pennant I used.  If you are trying to save even more money you can also use empty cereal boxes for card board.  You'll just have to cut the triangle out yourself.  I was running out of time and patience at this point so easy was a better option.  Plus it was only $4 at Hobby Lobby and I also used a 40% off coupon for extra savings. 
 Pick your color paper for each triangle.  Make sure you have enough for both sides for each triangle.
 Now flip the paper over and trace out a triangle using one of the pennants to get the correct shape.
 Once you have traced the shape, cut out the paper and paste each piece of paper to the pennant.
Find solid colors to cut out your letters.  Try to get your letters as straight as possible.  If you have them, find letter stencils for a more accurate shapes.
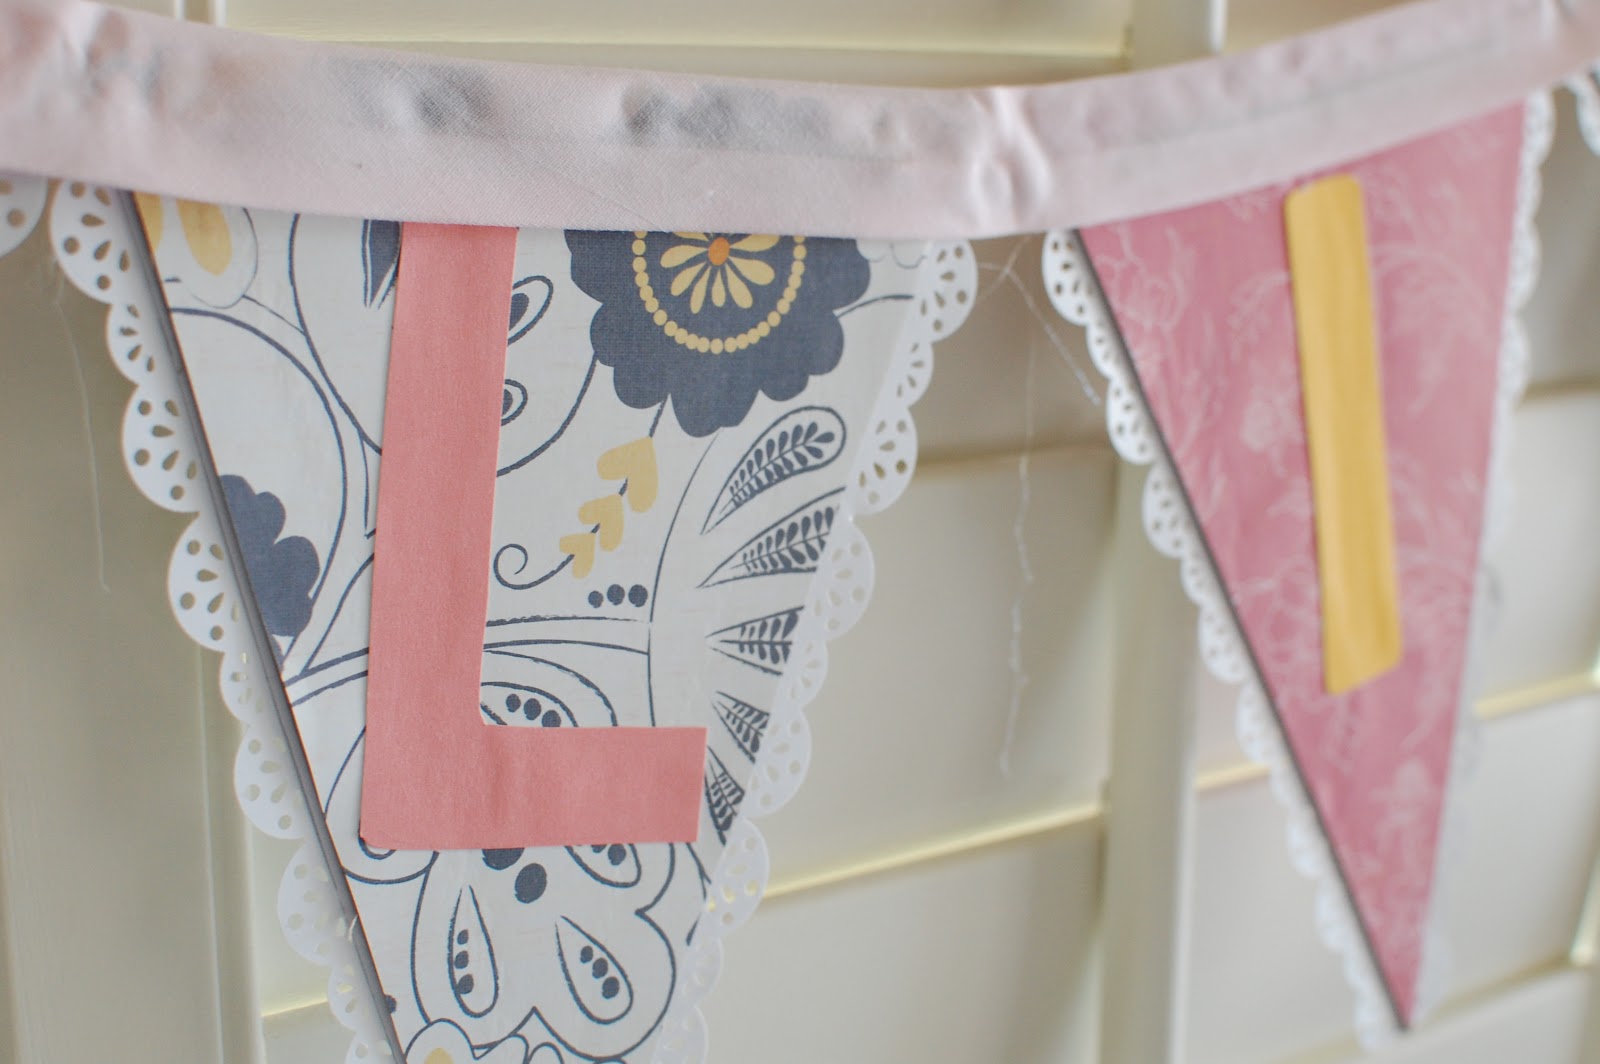
From here, glue on your letters.  Once you have put together all of your pennants let everything dry for a bit.  String your ribbon into the wholes of each pennant to get a banner going.
With the bias tape, open the flap and place your stringed banner along the folded edge.  The tricky part is gluing the top part of the banner with the glue gun and keeping it there.  Once you do one side (make sure one side has dried) flip your banner over carefully and glue the other inside flap of the bias tape to secure everything in place.

Have fun with your own banner!!

Sunday, July 15, 2012

Modern Baby Burp Cloths


It should come to no surprise that any and all inspiration to do anything crafty would be related to baby stuff.  And since babies need just about everything under the sun I figured I'd get cracking making as much as possible before baby gets here and demands all of my undivided attention.  Yup babies are soooo needy!

I've already focused my crazy couponing on buying diapers, diaper cream, wipes, as well as obtaining the cloth diapers from a friend.  I'll soon be making clothes, baby shoes, diaper bags, and the list goes on.  But I'll save that discussion for another day.  Today is all about fancy looking burp clothes.  I've seen several ways to makes these from Pinterest.com but this one I came up with myself that seemed the simplest.

Most of the pinners on the DYI boards suggested buying some sort of soft cottony cloth like chenille to go on the burping side.  But I could not find such a cloth.   And not to mention its a bit expensive per yard anyway and I'm trying to be, well, frugal.  Next was to find the most cheapest durable white fabric I could find, which came to about $7.99 per yard.  Close but no cigar!  So I opted for purchasing Gerber plain white burp clothes/multi-use diaper cloth at Walmart.  The 10 pack was about $12.50!  Now we're talkin'!

The gorgeous fabric can be found just about anywhere now.  I wanted to buy some from etsy.com but I'm too impatient for all of that.  So luckily Hobby Lobby had some designer fabric on sale for $6.99 per yard at 30% off which comes to about $4.99 a yard.  You can get about 2 finish burp cloths per yard.  I found that Fat Quarters gave me closest size to the white cloth and since they come in bundles they are usually super cheap.  This makes this project inexpensive but still cute!


So I lined up the fancy fabric of choice with the white cloth so they are the same size.  I'm in love with Amy Butler Designs-by-the-way.  The good side is in toward the cloth so when I sew them together they are back-to-back.  Pin around the edges so that while you sew the fabric doesn't move on you.  Now you are ready to do the fun stuff.


 Sew the edges together but be sure to leave a small corner un-sewn  with a "hole" so that you can flip the fabric inside  out.  I never remember to cut the corners to avoid bulky corners on the edges but I'm a novice seamstress so there you go!


Once you are done, push the fabric inside out through the hole you left on one side. 


One side will have the white cloth, the other side will have the fabric. 


Iron around the edges so they are flat.  This will reduce bunching when you sew around the edges again for that finished look.


Reenforce by sewing the edges one more time, keeping in mind you need to sew the hole up.


Now finish it off by flipping it over and sewing down the already made folds in the cloth to help keep the fabric and the cloth from shifting shape between washes.


And there you have it folks!  Fancy and modern burp clothes without the fancy price!


Monday, July 9, 2012

Back on track...to doing things

Since my first post, I have actually finished many things.  I completely forgot about this blog and I wanted to start a new one.  Well to my surprise I still have one I could access!  

I'm now 30 years old and I'm happy to report I have moved out of Cleveland.  I threw a dart at the map and it landed on Phoenix, Arizona.  I got lucky it didn't land in the middle of Mexico.  Or even more scary some remote part of Montana.  Seriously who lives in Montana?

Well since my move, I've managed to have a few odd ball art jobs, find a great guy I love dearly, get engaged and well....become pregnant to our surprise.  Thus spurring a new need to make all kinds of stuff.  Since we don't have all the money in the world to buy all the cutesy baby things and because I'm crafty, I've opted to make as much stuff I can in the few months I have left of being prego.  

Project Number One:  Decorations for upcoming baby shower
The variety of pom poms made from tissue paper resulted from experimenting with different sized tissue paper and different colors and my total lack of consistency.  I also used various edge cutters to get different styled edges.  All I really wanted was a scalloped/ rounded edge quickly and painlessly.  Since I couldn't find one left of this planet I opted to buy a few "fancy" onces with my Michael's 40% off coupons I reasoned would be used for some other project in the future.  Besides I love being cheap without having to look it.


I used Martha Stewart's and Fiskars punch tools to get this lacy edge.  I did manage however to brake one of the tools from trying to cut through too much paper at once.  DON'T MAKE THIS SAME MISTAKE.  Each pom pom requires around 8-10 sheets in order for it to look full.  I suggest cutting into 1-2 sheets at a time to avoid breaking your equipment.  I did fix the tool but still....

Also note that getting these fancy edges take more time and patience.  Patience I didn't have.

Instructions:

Start off with about 8-10 sheets of tissue paper.  10 sheets seemed to be the most ideal but if you can manage 12 this is actually the best for a fluffier and fuller pom pom.  I bought a packet of plain pink paper from The Party Center for 99 cents.  So it comes to me about $1 per pom pom.


Fold the papers like a fan.  Here are two different views to give you an idea.   Be sure to keep the width size the same through all the folds so that the pom pom looks consistent.


Once you folded the papers completely find the center and secure it with some type of wire.  I used pipe cleaner for this one because its soft and flexible.  I've also used old left over copper wire from my many projects in college.  Have a pair of needle nose pliers to cut these.  Don't use scissors to cut the wire. 

Round the edges with a pair of scissors if it isn't too difficult.  Be care not to cut yourself.  I got pretty close a few times.  

You can also cut the edges to a point to get a more spiked look.


Once you pull the sheets up and out you'll start to form ball.  Shape to your desired preference and that's it!  There are plenty of video tutorials online if you need more visuals.  
Paper Rose Decor


I learned how to make these beautiful paper roses out of paper crepe from The Idea Room by Amy Huntley.

These take a little more time to make but if you are enjoying a relaxing evening in front of the tv, its something to do with your hands! 

Here a link to the site for more info.


And there you have it, I actually finished something!