A few months ago I promised a friend I would write down a few things I've figured out as a new mom. Things that I have had to Google, ask friends, or figure out the hard way for myself. I hope this is helpful to other new parents too. I'm not suggesting that what all I say is the right way but what has worked or not worked for us (my husband, Russ and I).
DD = Dear Daughter
DS = Dear Son
DH = Dear Husband/Hubby
LO = Little One
BF = Breastfeed
EBF = Exclusively Breastfeed
Pregnancy First Trimester:
* Congratulations!! Now that you know you're pregnant you may feel like its the perfect excuse to quit smoking, exercise, or really eat right. Great! But now is not the time to start training for that marathon, sign up for a high-impact work out class like Zumba, go on that new trendy weight loss diet, or do a deep cleansing detox program. Oh and extreme sports will have to wait. I actually wanted to do Zumba...ahem...silly me.
* Sleep as often as you need to. Take naps if and when you can. The dishes and the laundry can wait. I personally felt like I was hit by a tranquilizer gun almost every day. Why can't I stay awake for more than four hours at a time? It's those hormone hard at work. This will pass in the second trimester.
* Eat when you need to and drink plenty of water to stay hydrated. Your body is adjusting to growing a new life! Eating provides you energy so satisfy those cravings, this is the best part of pregnancy. Don't worry about being hungry all the time. If you eat a meal and you find yourself hungry an hour later go ahead and eat again. Don't just say to your self "oh but I just ate!" Its ok to go for seconds. Some women get a mini fridge to put by the bed for midnight snacks. Do what you gotta do!
* Find out what you can and cannot eat while pregnant. We all know about sushi and raw meat but there are other foods to be aware of. It changes all the time by-the-way. A few years ago it was spinach due to the possibility of getting listeria. Last year while I was pregnant it was lunch meat. Not to say I thought I was going to get listeria automatically if I ate lunch meat but at least I was aware of risks. Listeria is a concern because the bacteria can cross into your placenta and cause complications for your baby. You can also check out foodsafety.gov to find out recalls for foods. Last year there was a recall on some peanut butter from certain companies. Some medical specialist say not to eat foreign cheese or anything that's not pasteurized. There's no need to fear everything but doing some research and being in the know won't hurt.
* Start a baby diary. It will be fun to go back and remember those thoughts and feelings you had while being pregnant. I did a creative art journal for mine adding in photos, keeping record of doctor visits and even left space for Russ to add his thoughts to.
Pregnancy Second Trimester:
* You'll now need to consider adding a few maternity clothes to your wardrobe. Whether you buy a new maternity dress or put some elastic on a pair of old jeans, celebrate that new baby bump whatever way you know how. If maternity clothes are too costly consider getting loose fitting clothes where you already shop. Old Navy and Forever 21 were among my favorites.
* Get your hair done, paint your nails, or get a new shade of lip stick. Its easy to worry about exposure to chemicals while pregnant but baby will be ok. There are maternity friendly nail polish available too if you are really concerned. Look and feel fabulous along with your efforts to stay healthy.
* By now you're wondering what all you need for your baby. Take someone who is a parent to the store with you and go over some or all of the baby items. They might help you at least be able to narrow down what stroller or car seat to get.
Pregnancy Third Trimester:
* While getting your last detail in order don't forget to stock up on items now before baby is born. I was told to spend about $20 a month for baby items so I don't need to get them all at once. With coupons and discounts I stocked up on diapers from sizes Newborn, 1, 2, and 3 so I didn't have to run to the store too often from running out. Don't worry too much about getting too many of one size you can exchange sizes at the store if they allow it as long as the bag is unopened. If the store won't exchange for a larger size you can give the bag of diapers to charity, a shelter, or even a friend!
* Remember to walk as much as possible (This is where those new pair of comfortable walking shoes come in). You don't have to over do it, just 40 minutes at a steady pace will do. The idea is to keep your heart rate up to practice for active labor. If your legs start to hurt or you begin cramping slow down! Take breaks if necessary, stay hydrated and put your feet up if they are swelling. To avoid the harsh weather conditions like extreme hot or cold during the seasons, find places you can walk without prolonged exposure to the elements. I found a mall near by that I went to 3 times a week to get in my daily walks. The mall employees began to recognize me after a while and even cheered me on!
* Try to get as much sleep as you can during these last couple of weeks. It seems difficult with being so uncomfortable and frequent leg cramps but once baby arrives sleep will be hard to come by. Eating bananas help ease leg cramps too!
* Get maternity portraits! You'll be amazed later at how much your body changed with your pregnancy. Even if you don't feel your prettiest you might regret it later if you don't.
The Hospital or Birthing Center:
* If you chose to give birth outside the home its a good idea to do a tour at least a month before your due date. Keep in mind that some hospital tours fill up fast and you may have to wait an entire month or two for the next available tour. They need to be scheduled, you usually can't just walk in and ask for a quick tour because they do them in groups. The tour also gives you a chance to find out that hospital's procedures on security, how long your stay will be, where your partner can stay, if the baby stays with you in the room or stays in a nursery, do you get a private room or do you share with another family, etc.
* If you have specific concerns this is when to address them. I requested that at least one parent stayed with DD at all times including during tests. We were also interested in their "Baby Lojack," the security system for keeping babies from being kidnapped.
* Find out where you are to go during regular business hours and also after hours. You don't want to be going from door to door looking for the right place to go while in labor. Most likely they will ask you to fill out paper work before you arrive in labor as well. Most hospitals also have an online form so you can fill out everything at home.
Birth Plan:
* This is something you write out that you intend for your labor and delivery. Its good to go over some details including what do to in the case of emergency. Especially if you are particular about procedures like blood transfusion, pain management, etc. If you have any last questions about giving birth this helps narrow down questions and concerns too. I got mine from thebump.com. With that said, don't be disappointed if everything doesn't go as planned. Remember to be flexible and stay positive!
Breastfeeding:
* It has its many joys, rewards, and benefits for you and baby. It also comes with its own challenges too. There is a lot of information out there for those who want to successfully breastfeed. Some great resources are WIC, Le Leche League, Baby Center.com, The Bump.com, forums and lactating specialist. Friends who may have breastfed their babies are also a great resource. I wasn't shy and asked a friend years ago if I could see her breastfeed her daughter. This gave me the confidence years later to breastfeed my daughter. They can also give you some tips or most important some emotional support while you are learning to breastfeed your little one. Set up some goals and questions you might have before giving birth to ease any anxiety you may have about it.
* Look up "Breast Crawl." You can youtube it and find some really old videos of it. I watched one from India that gave me an idea as to what it was. Basically right after giving birth within 15 minutes - 1 hour allow your baby to find his/her way to one of your breast on his own. They will wiggle and squirm themselves unassisted to the breast and begin sucking! I held onto my daughter just so she wouldn't fall but for the most part she did it all by herself in a matter of minutes. I've been told this initiates successful breastfeeding instincts for baby.
* In the hospital let the medical staff/ nurses know you are breastfeeding and they will give you helpful tips and advise to get you started. Even though breastfeeding is natural it takes practice for both you and baby.
* If they bring you formula don't give it to baby just yet but keep for emergencies later. Say for example you don't produce enough milk right away and you need a small break from trying. We used one of the bottles of formula for the ride home from the hospital and I was glad to have it on hand. They say to wait at least 3-4 weeks or even longer to introduce a bottle or pacifier for successful breastfeeding to avoid nipple confusion. However we had to supplement with formula along side breast milk due to a low milk supply while I spent a week in the hospital two weeks after giving birth. We were lucky though DD didn't have nipple confusion and actually preferred the taste of breast milk.
* Have a glass of water near by when you sit down to nurse. I always became parched as soon as I began. A good Boppy helped make baby and me comfortable while I held her. If you don't have one pillows work too. Keep in mind your arms will get tired especially if baby is a slow eater.
* Invest in a good breast pump. The manual ones aren't as useful if you plan on breastfeeding long term. The electric pumps help with successful breastfeeding too because they aid in increasing your milk supply. If you qualify for WIC they may even provide you with one to rent if you plan to exclusively breastfeed. In addition get a box of breast pad BEFORE you give birth so you don't forget. Your breasts do leak milk! When your baby cries your body's response is to let down the milk even if it's not feeding time and before you know it you have a wet shirt. Even out and about while grocery shopping and such, if you hear a stranger's baby crying you'll leak even still.
* There are different solutions to sore nipples. First you can use your own breast milk. Coat the nipple right after each feeding and it acts as a natural healer. There's also lanolin balms (that's actually wool grease from sheep) and you can find it in most stores. Some love the stuff and you don't have to wipe it off before each feeding. However it caused my nipples to be in prolonged pain and didn't help the healing. I also found out that some infants have a bad reaction to lanolin too. Once I stopped using the lanolin the pain from breastfeeding when from a 10 down to a 3 in a week. I also took a break from breastfeeding for a week so that may have helped too. The best thing I found out there is Nipple Butter by Earth Mama Angel Baby. It smells good, heals my nipples and DD seems to like it too.
* "Ouch! Breastfeeding hurts!" Yes at first this will be difficult but your nipples will adjust to their new job. If you continue to have pain after a week you may have some latching issues. If you still have pain even when you know baby is latching properly you may have a yeast infection of the nipples. Yup it happens. Mine hurt so bad I was crying every time I nursed. I took a break from breastfeeding for a few days to allow them to heal and treated my nipples. I have no idea if I had a yeast infection but I was all out of ideas. Within a week or so the pain stopped, I picked up where I left off and breastfeeding continued. Most importantly if you really want to breastfeed don't give up.
* "My baby wants to nurse all the time and use me as a pacifier. On top of that she won't take a pacifier! Ugh!" Sorry folks I don't have a solution to that one. I finally gave into the fact that DD is comforted by nursing and stopped worrying about it. There are days where I felt like all I did was nurse...all day! The first couple of weeks I hardly left the couch. It can be frustrating but remember this also keeps up your milk supply and continues the bond between you and baby.
* Milk Supply- I worried about not having enough milk to EBF. As is turned out I didn't have enough and worrying didn't help. What did help was taking a supplement with Fenugreek. I took More Milk Plus by Motherlove and I wish I'd known about it before. When I began to take it my daughter finally got a full belly from my breast milk alone, then fell asleep satisfied for the first time and I literally cried! I was finally able to stop supplementing formula. The capsules are around $25 a bottle so do some research first. Some people respond to the benefits and some do not. You can buy a $5 box of tea called Mother's Milk to see if your body respond to the herbs although the increase in milk will only be slightly with the tea versus the herbal capsules. For some reason I don't produce as much milk with More Milk Special Blend as I do with the More Milk Plus. Pumping an hour after a feeding helps increase milk supply as well.
* Nurse, Nurse, Nurse. The more you nurse the more your body will produce milk. However the more milk you have the more chances you have of getting clogged glands. When you get clogged glands (which is really painful) nothing empties your breast like your baby, not even pumping! You can also take a warm shower or use a hot compress and while massaging where the clog is located and pump your milk to help unclog your glands. Mastitis is a common breastfeeding problem. Here's a weird one but getting on all fours (hands and knees) help too. Not sure why but perhaps this adjusts the flow in your breasts and thus unclogs the milk.
* Your breast milk make antibodies for your little one. Even if you get sick (unless told by a medical professional) continue nursing. Your milk will protect baby from illness. Even if your baby becomes sick anyway, the milk will adjust itself to help them get well sooner.
* Don't heat breast milk or formula in the microwave. The fat in them creates hot spots and can actually scold your baby's mouth. The safest way is to use a bottle warmer or heat in the bottle over the stove with water in the pot. Always check the temperature on your wrist before giving to baby. Some parents run hot water over the bottle to slowly warm up the milk but that didn't work well for me plus it wasted too much water.
Diapers Rash: I have found the best way to combat or prevent diaper rash is to pat baby dry after each diaper change. I use pre-fold or flat-fold cloth diapers. The more I used creams the worse the rash got. If the rash gets too bad it turns into a yeast infection. Each baby reacts to creams differently so you may even have to try different brand names and types. The most common issue is the Zinc in the creams that babies have a bad reaction to. Try ones without zinc to see if the results are better. Also allowing baby's bottom to air dry and go without a diaper is great too.
Why is my baby crying?: A baby's only communication to you is crying! Don't ignore your crying baby, he is trying to tell you something. The older generations may tell you to let your baby cry and not to worry about it but babies don't enjoy crying and it can be more stressful than necessary. Here are some common reasons: Hungry, tired, need a diaper change, gas, lonely, bored, hot, cold, over stimulated, or diaper rash. There are some other reasons we may not even think about. Upset tummy, acid reflux, hair looped around fingers and toes, bug bites or even their clothes may be bothering them. For example, those head bands are cute but when left on too long they might get a head ache. Or maybe the tag on their outfit is itching them. Most commonly was DD having gas. Sometimes simply lifting them up helped release gas and she was happy in seconds! Responding to your baby's cries let them know they can count on you and to trust you. You aren't spoiling your baby by holding them either. Babies need constant affection. You don't need to try to teach them independence at this 3 months old. They aren't trying to manipulate you when they cry. Under the age of one they don't know how to manipulate you.
Hungry: If you baby is becoming hungry they will make sucking sounds or start sucking on their hands. You don't need to wait until your baby is howling to begin feeding him. At this point he is beyond hungry. Look for the signs early on. This will also help feeding be more relaxed and successful. You can predict when the next feeding time by timing each feeding. Nursing on demand allows the child to get enough milk or formula necessary for his needs but you can guess when these feedings are by timing that feeding. For example if baby begins to eat at 8 am, takes 30 minutes to eat and at 10 am he is hungry again then he eats every two hours. Feed him at 10 am. Even though he wasn't done until 8:30 you start the time at the beginning of each feeding, or 8 am. After the 10 am feeding, anticipate the next feeding at noon. I'm flexible with the feedings. If my baby is hungry at 11:50 and the next feeding should be at noon I go ahead and feed her. Waiting the extra 10 minutes isn't necessary.
"My baby hates when I put her down! Seriously this is crazy." Again babies need to be held and you aren't spoiling them by holding them often. You aren't the only one with a baby that wants to eat, sleep, and be in your arms ALL DAY. Some babies are more needy than others I guess. It gets easier every month get older, I promise. Once they are trying to reach for things or can hold themselves up they'll be able to occupy their time without you for longer. Baby wearing is the best especially when your arms need a break. You can try different slings, wraps or carriers that work best for you and LO. Our baby swing saved my sanity too. It kept DD entertained for a bit or swung her to sleep so I highly recommend getting one. Swaddling helps too when you are desperate to put them down and they get fussy when you do. The extra feeling of security calms them so putting them down isn't so upsetting.
Sleeping: Good luck getting them to sleep on a schedule you want them to sleep to. Consistency is key but keep in mind their sleeping patterns may change every few months. I admit that I nurse DD to sleep and she often naps in our arms. I know I'm creating a monster but I've made peace with it. The cry-it-out method doesn't work for DD. She only cry longer and get more upset the more we tried. I mean crying/screaming for an hour or more and that's not how CIO works. Plus there are studies that show that CIO may actually have negative results for baby including and not limited to depression and sleeping disorders later. I encourage all parents to do research on the positive and negatives of CIO methods and alternative methods as well.
Skin Rashes: After a few weeks your newborn may develop rashes. They may be due to illness/ disease or they could be skin reactions to soap and lotions. I figured out that even though I was using the most mild natural soap I can find (my favorite being Burt's Bees) DD still developed a rash from the neck down. I found that putting the soap on her wash cloth and directly onto skin caused irritation. Instead I put the soap directly into her bath water and used the wash cloth without soap on it. She still got clean and the rash was gone in a few days.
Teething:
* We all know about teething rings and Orajel for babies but if you are looking for more natural solutions you have options. Look up Punkin Butt Teething Oil. You rub the oil on their gums and it eases their pain. Its a little harder to find though so try your local holistic/natural baby store (I found mine at Zoolikins in Phoenix), other wise try online.
* Mommy Teething necklaces that you wear and baby can chew on are popular too.
* Baltic Amber teething necklaces and bracelets have been used for ages in Europe. These are NOT to be chewed on by baby but the idea is that the natural oils in the amber works as side-effects free solution to teething pain. The succinic acid in the amber acts as an anti-inflammatory. Some mommies swear by these necklaces. Make sure it is actual Baltic amber. The beads you can buy at Hobby Lobby and Michaels aren't real amber, they are glass if your are considering making your own necklaces. I bought our necklace online from Etsy.com. I think it helped our DD but others consider it a panacea. The worst case scenario is it doesn't work for your LO and you have a cute piece of jewelery instead.
"Why does my baby cry in the car seat every time?" It could be acid reflux. I realized she had acid reflux when her burp cloths were soaked in spit up every feeding and she began choking (almost to death) every night at bed time. I remembered when a friend had a similar problem with her 2 month old having screaming fits in her car seat for every car ride. Her LO had acid reflux too and it all began to make sense. Our pediatrician prescribed a low dose of a generic liquid Zantac formulated for babies. Within weeks we had a happy, healthy baby and I happy mommy not covered in spit up.
If baby comes down with the flu, its important to make sure baby has plenty of fluids. However DO NOT give your baby carbonated drinks. The sugar in sodas actually draw out water from a baby's intestines making their condition worse. Check with your pediatrician on such matters and on anything you have questions on.
I hope all of this helps! There are many info sites on parenting online and in your community. There are so many resources we have at our fingertips these day so use them. Most questions you may have you can google and more often then not someone has already asked the same thing. The best tips I've ever gotten where from friends who have had children before me. Even if they can't help they can at least sympathize. Good luck to you and your expanding families!
Friday, September 27, 2013
Monday, September 3, 2012
Creating a banner for baby Juliet

This is the finished product for my baby shower. I'm sure you see some Pinterest ideas all put together in one event. I made the decorative cup cake stands, rosette balls, pom poms, tea sandwiches, cranberry scones, and of course the Juliet banner.

This post will highlight how I made the banner. It's really simple and you can make yours anyway you want it to.
For most of it I used what I already had available in my craft room. There are a few items I had to purchase.
Materials used:
* Scrap booking paper of choice
* Bias Tape
*Glue Gun
*Ribbon
*Chipboard Pennant (cardboard triangles: I used 6"x9" Extra heavy by Paper Accents)
*Decorative punch
Pick a color, I chose white, to make the trim around the triangles. Use any decorative punch that will give you a clean edge on the other side. You will be gluing this on the back side of your triangle.

This is Chipboard Pennant I used. If you are trying to save even more money you can also use empty cereal boxes for card board. You'll just have to cut the triangle out yourself. I was running out of time and patience at this point so easy was a better option. Plus it was only $4 at Hobby Lobby and I also used a 40% off coupon for extra savings.

Pick your color paper for each triangle. Make sure you have enough for both sides for each triangle.

Now flip the paper over and trace out a triangle using one of the pennants to get the correct shape.

Once you have traced the shape, cut out the paper and paste each piece of paper to the pennant.

Find solid colors to cut out your letters. Try to get your letters as straight as possible. If you have them, find letter stencils for a more accurate shapes.
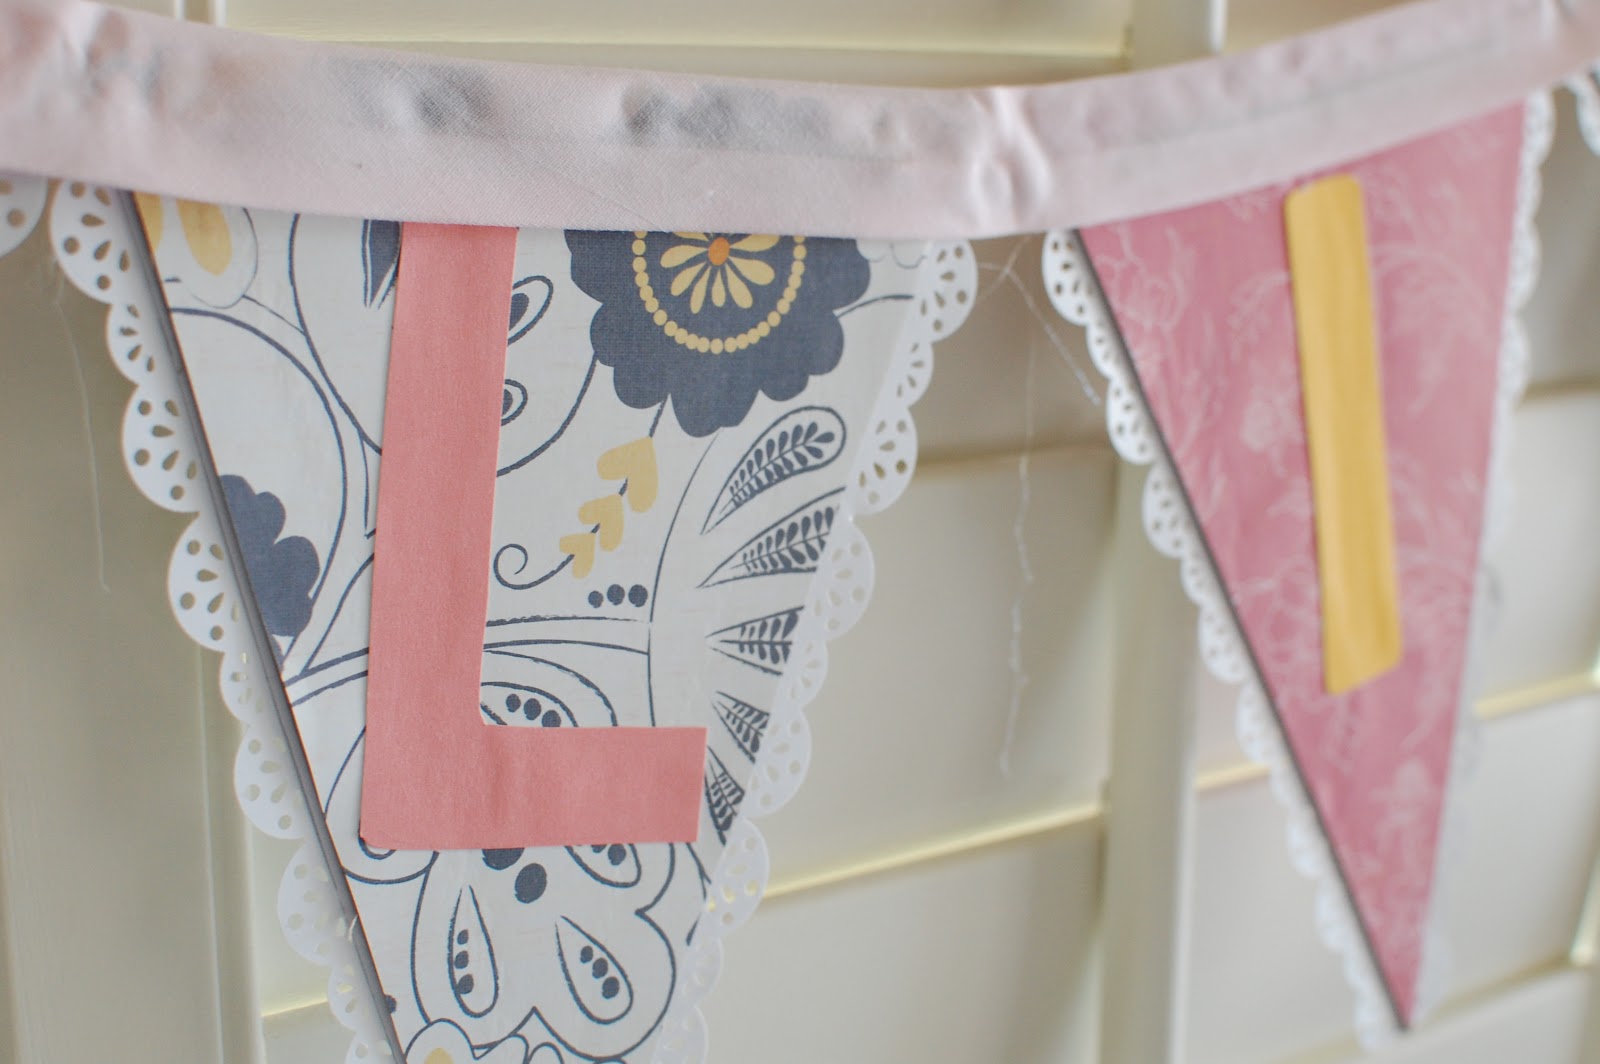
From here, glue on your letters. Once you have put together all of your pennants let everything dry for a bit. String your ribbon into the wholes of each pennant to get a banner going.
With the bias tape, open the flap and place your stringed banner along the folded edge. The tricky part is gluing the top part of the banner with the glue gun and keeping it there. Once you do one side (make sure one side has dried) flip your banner over carefully and glue the other inside flap of the bias tape to secure everything in place.
Have fun with your own banner!!
Sunday, July 15, 2012
Modern Baby Burp Cloths

It should come to no surprise that any and all inspiration to do anything crafty would be related to baby stuff. And since babies need just about everything under the sun I figured I'd get cracking making as much as possible before baby gets here and demands all of my undivided attention. Yup babies are soooo needy!
I've already focused my crazy couponing on buying diapers, diaper cream, wipes, as well as obtaining the cloth diapers from a friend. I'll soon be making clothes, baby shoes, diaper bags, and the list goes on. But I'll save that discussion for another day. Today is all about fancy looking burp clothes. I've seen several ways to makes these from Pinterest.com but this one I came up with myself that seemed the simplest.
Most of the pinners on the DYI boards suggested buying some sort of soft cottony cloth like chenille to go on the burping side. But I could not find such a cloth. And not to mention its a bit expensive per yard anyway and I'm trying to be, well, frugal. Next was to find the most cheapest durable white fabric I could find, which came to about $7.99 per yard. Close but no cigar! So I opted for purchasing Gerber plain white burp clothes/multi-use diaper cloth at Walmart. The 10 pack was about $12.50! Now we're talkin'!
The gorgeous fabric can be found just about anywhere now. I wanted to buy some from etsy.com but I'm too impatient for all of that. So luckily Hobby Lobby had some designer fabric on sale for $6.99 per yard at 30% off which comes to about $4.99 a yard. You can get about 2 finish burp cloths per yard. I found that Fat Quarters gave me closest size to the white cloth and since they come in bundles they are usually super cheap. This makes this project inexpensive but still cute!


So I lined up the fancy fabric of choice with the white cloth so they are the same size. I'm in love with Amy Butler Designs-by-the-way. The good side is in toward the cloth so when I sew them together they are back-to-back. Pin around the edges so that while you sew the fabric doesn't move on you. Now you are ready to do the fun stuff.

Sew the edges together but be sure to leave a small corner un-sewn with a "hole" so that you can flip the fabric inside out. I never remember to cut the corners to avoid bulky corners on the edges but I'm a novice seamstress so there you go!
Once you are done, push the fabric inside out through the hole you left on one side.

One side will have the white cloth, the other side will have the fabric.

Iron around the edges so they are flat. This will reduce bunching when you sew around the edges again for that finished look.

Reenforce by sewing the edges one more time, keeping in mind you need to sew the hole up.


Now finish it off by flipping it over and sewing down the already made folds in the cloth to help keep the fabric and the cloth from shifting shape between washes.

And there you have it folks! Fancy and modern burp clothes without the fancy price!

Monday, July 9, 2012
Back on track...to doing things
Since my first post, I have actually finished many things. I completely forgot about this blog and I wanted to start a new one. Well to my surprise I still have one I could access!
I'm now 30 years old and I'm happy to report I have moved out of Cleveland. I threw a dart at the map and it landed on Phoenix, Arizona. I got lucky it didn't land in the middle of Mexico. Or even more scary some remote part of Montana. Seriously who lives in Montana?
Well since my move, I've managed to have a few odd ball art jobs, find a great guy I love dearly, get engaged and well....become pregnant to our surprise. Thus spurring a new need to make all kinds of stuff. Since we don't have all the money in the world to buy all the cutesy baby things and because I'm crafty, I've opted to make as much stuff I can in the few months I have left of being prego.
Project Number One: Decorations for upcoming baby shower


I used Martha Stewart's and Fiskars punch tools to get this lacy edge. I did manage however to brake one of the tools from trying to cut through too much paper at once. DON'T MAKE THIS SAME MISTAKE. Each pom pom requires around 8-10 sheets in order for it to look full. I suggest cutting into 1-2 sheets at a time to avoid breaking your equipment. I did fix the tool but still....
Also note that getting these fancy edges take more time and patience. Patience I didn't have.
Instructions:


Fold the papers like a fan. Here are two different views to give you an idea. Be sure to keep the width size the same through all the folds so that the pom pom looks consistent.

Once you folded the papers completely find the center and secure it with some type of wire. I used pipe cleaner for this one because its soft and flexible. I've also used old left over copper wire from my many projects in college. Have a pair of needle nose pliers to cut these. Don't use scissors to cut the wire.


Round the edges with a pair of scissors if it isn't too difficult. Be care not to cut yourself. I got pretty close a few times.
You can also cut the edges to a point to get a more spiked look.


Once you pull the sheets up and out you'll start to form ball. Shape to your desired preference and that's it! There are plenty of video tutorials online if you need more visuals.
 |
| Paper Rose Decor |


I learned how to make these beautiful paper roses out of paper crepe from The Idea Room by Amy Huntley.
These take a little more time to make but if you are enjoying a relaxing evening in front of the tv, its something to do with your hands!
Here a link to the site for more info.
And there you have it, I actually finished something!
Tuesday, January 12, 2010
Day One The day I start to do something
How easy it is to talk myself out of doing anything. Its rare that I complete anything. From the biggest tasks to the smallest ones. One month ago I turned 28 and realized it was time I woke up and beginning doing something with my life. It is after all way too short.
Its actually easier than I make it out to be. I make so many things in my life harder than necessary. I always wanted to learn how to make sushi. 10 years later I finally went to a sushi making party and made it myself. And yes I am patting my self on the back thank you very much. I've always wanted to learn how to play the violin too. I finally got around to doing that 15 years later too. But hey at least I did it. So now that I'm on a roll here is a list of things its time for me to finally get around to doing.
1. Finish a piece of art work starting with one of the 8 I have sitting at home in my living room/makeshift art studio
2. Sew on buttons of so many clothes I have that make me look like I don't care what I look like...cause lets face it most days I just don't.
3. Print one of my photographs and frame it.
4. Do another art show, with in the next two months.
5. Move out of Cleveland!
And the list goes on. I bet thats all I need to do. Make a list and start checking them off. So here I go starting with number 1
Subscribe to:
Posts (Atom)